Saturday, November 23, 2013

An All Saints Day Adventure

This year I really wanted to find a way to help me children have extra fun in celebrating All Saints Day.  I puzzled a bit about what to do and before I knew it the day was upon us.  When I came home at 5pm that night I threw together a quick "All Saints Day Adventure" that was not only fun but also helped reinforce how we can all be Saints. 


Step 1:  Dress up your kids like Saints! 

It is not every day that you get to parade your kids around the store in a costume and a Saint makes it even more fun.  My kids choose Blessed Mother Mary and Padre Pio for their costumes.  I used a blue pillow case for my daughter's costume, just cutting a hold at the top for her head and a pillow case for her veil.  For my son we put a brown wrap that I had on him and added a stigmata to his hands.  They loved the costumes!


Step 2:  Go to the store and buy your "Adventure" Goodies. 

We had three Saintly Missions "Feed the Poor & Cloth the Naked", "Love Others" and "Take Care of Animals".  We stopped at the local store in our costumes and picked up Cat Food, Canned Goods, Mittens and Candy.  We had lots of smiles and probably created a stir by taking our kids in costume to the store, it was fun!


Step 3:  Jump in the Car and carry out your Mission to be a Saint!


Mission #1 "Love Others"

We read a short story about Saint Bernadette who spent her life praying for others and suffered greatly during her short life.  We talked about how loving she was by taking time to "Love Others" through sacrifice and prayer.  Since my children love candy we talked about how we could eat the candy we bought ourselves or we could share it with others and pray for them.  Luckily they choose to share and we dropped off the candies with a small prayer card about St. Bernadette at the local Convent.  My kids had colds so they couldn't see the Sisters, since they are mostly elderly, but they were so excited to see where the Sister's lived and prayed for us and the world.
 

Mission #2 "Take Care of Animals"

 
We read a short story about St. Francis, one of their favorite Saints and then headed to the local pet shelter.  The Pet Shelter was quite surprised to see our little Saints and were very happy to have the Cat food.  We left a little St. Francis card with them and had many smiles as we left. 


Mission #3 "Feed the Poor and Cloth the Naked"

We read a short story about Saint Teresa and discussed why we need to be like Jesus by taking care of others.  We took our food and mittens to a local shelter where the kids helped carry in all the goodies.  It was so late we didn't get a picture but it was very special as you can tell by the dancing Saints below.


By the time we finished up our Missions it was quite late and our kids fell asleep in the car.  My favorite part of the whole mission was that my son loved being Padre Pio so much that he dressed as him the next 3 days!!!!  He even requested that I touch up his stigmata every time he washed his hands.
 
With a little more time and thought I am sure anyone could make this an even more exciting and Saint-filled adventure, but for a quick 5pm idea on a Friday night I am happy with the results!


Hear Ye! Hear Ye!  A Birthday for Knights, Princesses and Dragons!

So I greatly enjoy the creativity of planning a birthday party for my kids. Each year reflects their current hobbies and changes in their little personalities.  This year my son Asher turned 4 and I had to smile as I thought back over the years and his Birthday Themes.  When he was 2, he choose Owls which I quickly was able to pull together....Owls are so popular!

 
When he turned 3 he choose Airplanes....so easy! 
But as we approached 4, he made a special request for a Knight and Princess Party.....not so easy! I looked in stores and on the internet and almost every option was very expensive or too grown up for a 4 year old.  So, for those of you who are also have kids that love a good Medieval Party I had to share my easy and inexpensive solution!


Food! A Feast for Kings!

In the summer we can't help but use the grill, so we decided on a BBQ.  We just had to figure out how to make this all work for our Knight theme, so I came up with some clever food name cards.


Dragon Fire Grilled Meats


Bravery Beans!


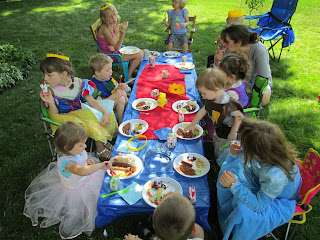
And to add some fun we converted a large piece of wood into a long table for our Knights and Princesses to enjoy their banquet.  We placed the board on top of 5 gallon pals and used 2 long plastic table clothes with a long red runner.  Very Fun!


Next Came the Costumes!

Let me tell you how expensive options are online....very!  To keep it reasonable and easy I asked all the parents to dress up their kids and I made a simple crown with felt, hot glue and a scissor so everyone felt extra Royal.


For my boys they already had some Knight costumes, but I bought some fabric to make tunics.  I used a scissors to cut a hole for their heads and used felt to decorate the front.  A little hot glue to put the felt on and they were all set!


Let the Games Begin!

 
Since my children are young we always aim for simple.  Which usually mean a book and a piñata.  This year I picked "The Knight and the Dragon", which has a few words and allows the kids to help explain the pictures.  We followed this up with our "Pinata" of sorts.... 
 
 
 I skipped the traditional piñata, which they love to help with for a new idea...Piñata Dragon Eggs.  I made the piñata but instead of hanging the piñata I decided to use tissue paper to wrap up the entire egg which of course was filled with treats for the children.  They loved the idea and so did the little guests.  Each guest picked a friend to open up their egg with and shared the goodies with everyone! So easy and so fun!


And for some easy Medieval play we brought out all of our toys that fit the theme.  I find that usually my kids have toys in any theme they choose since it is something they are "into" at that age.  We  had a castle that the toddlers really liked!


Décor

Okay, I really went basic on Décor since we were outside and we had the cool banquet table.  I was able to make some nice banners for the special day out of paper and that was it!  It was great with the theme and I was quite happy with the effect.


And of course every Feast needs some Cake!


My mom did a beautiful job with a castle cake which she complimented with some Knight and Dragon bath toys. 
 
The day was a success and I am happy that Asher choose a Knight party~

Sunday, February 10, 2013

Skip the Cart! Let's make Valentine's from the Heart!

My kids eye were so big as we walked through the store with boxes upon boxes of St. Valentine's Day cards.  They each picked their box, but as soon as we were at home and about to sit down to writing names on them they quickly wanted to run away to play.  Asher is too young to write, so I understand his desire to go play and Anika had no interest in writing her name 20 times.  This simply wasn't worth the battle and we had a few weeks, so i decided to try again the next day. 

The next day brought no more success, so I decided to try a new approach.  The kids LOVE to share their own creations, so maybe we could make our valentines this year.  We needed simple Valentine's Day cards to make this feat achievable, so I put my creativity to the test.

Of course I checked the internet for some inspiration, which found lavish and perfectly made valentine's beyond not only the abilities of the kids...but admittedly beyond my ability too.  So, I simplified and came up with some kid appealling ideas.  They loved making the Valentine's Day cards and I am sure that those that receive these unique pieces of art will feel very LOVED!

Turtles, Butterflies and Superheroes

Supplies:
Construction Paper
Crayons/Markers
Scissors
Lollipops
Tape


I started by cutting construction paper in the basic shapes for our Valentines. 


The kids used their marker's to decorate their valentines.  Anika had a list of her classmates so she addressed each one herself (Proud mommy moment!).  For Asher I added his name to each piece of art.


I folded each valentine in half the long way and make two small slits where the lollipop could be inserted.

The kids helped add the lollipop making some  SUPER cute Valentine's extra special!


Then we added a little tape to secure the lollipop and I officially felt like a SUPERHERO MOMMY!

I AM CERTAIN THEIR LITTLE FRIENDS WILL BE IMPRESSED!

Saturday, January 26, 2013

Making Birthday Parties a gift from your Growing family!

Psalm 139:13-14

New International Version (NIV)
13 For you created my inmost being;
    you knit me together in my mother’s womb.
14 I praise you because I am fearfully and wonderfully made;
    your works are wonderful,
    I know that full well

Birthdays are a very special time!  With our growing family, preparing for a birthday party in the last year has felt like a a choice between sacrificing family time or sleep.  This year I thought I would include our kids in preparing for Abram's 1st Birthday Party and it was a huge hit!  No late nights...okay maybe one....a few more messes, but overall an incredibly cute party with some great family fun preparing everything.  Here are some of the easy ideas that worked well for us!


 Choosing a Theme and my Rule of Thumb

I am a big fan of having a theme for a birthday party, especially when little ones are involved.  You can direct their little artists hands around that theme and you will have a cute and cohesive party.  We landed on "Winter ONEderland" since it was looking a bit snowy outside.  The theme was big enough that the kids and I could be creative and I could pull from our Christmas decorations as well.

As a rule I give myself a few weeks to get ready for a party.  Spreading the preparations out help you and your family enjoy the process instead of feeling rushed.  Also it build anticipation for the special day!!! 


 Flour + Water = Fun!

With our theme in mind, I decided that a penguin would be the easiest pinata for us to create.  Pinatas have become a birthday party staple at our house.  They are incredibly inexpensive to make and the kids LOVE helping out.  We usually break the pinata making into multiple days, which helps keep them interested and provides me a little break to rebuild my patience and clean up the kitchen :)

Making a Pinata

Day 1:

Supplies:
Balloon
 1 cup Flour
 2 cups Water
 approx 1/2 inch strips of newspaper (my kids help cut the paper)
 string

1. Blow up Ballon to size that you would like your pinata to be
2.  Mix Flour and Water in a bowl
3.  Hang Ballon from ceiling or light by a string
4. Place newspaper over work surface
5.  Take a strip and Dip into Flour solution, remove excess
6. Place strip on Balloon
7. Repeat until the entire balloon is covered with 2-3 layers, but leave an opening at the top, near the string for putting in candy  and prizes.  Reinforce this area around the opening with an extra 2-3 layers so that it can handle the weight of the pinata when it is hung.
8. Allow to dry overnight


Day 2:

Supplies:
Paint

I had my kids get on their paint smocks and they helped paint the "Base Color" for our pinata. Only having them work with one color helped minimize the mess and simplify the painting process....no cleaning brushes between colors!  This year we were making a Blue penguin so they helped paint the entire pinata blue.  Once this step was completed, I let them know that mommy would finish it later once the paint dried. When they were in bed I added the details.

Day 3:

Supplies:
Small Candy and/or Prizes

This is a favorite step for the kids and there little hands are simply better at putting the little prizes and candy into the hole at the top of the pinata.  Once this is done I punch two holes about 2 inches from the top on opposite sides for the ribbon that we will hang the pinata from. 


Abram with his Penguin Pinata


Making a Game

I swear that "Pin the Tale on the Donkey" is the most versatile game EVER!  Just consider your theme and what you could "pin".  We landed on "Pin the Fish in the Pond"  because Penguins love Fish! 

Supplies:
Poster Board
Markers
Construction Paper


I created the overall background  and let the kids help out with the details, extra coloring and their own special touches.  Keep it simple and enjoy their imaginative ideas.  Who knew they had rainbows at the North Pole!

Fancy Food Labels

I may be known for labeling food for my guests, since I can be a creative cook.  I kept the menu very simple for this party, but still thought it would be fun to make themed food labels.  I decided on penguins and cut out the construction paper, allowing the kids to glue and decorate them.  Then I added a little label with the food description.  They were adorable!


Decorate the House


This is where having a theme is really fun.  I just set the kids down with some markers and paper and let them create masterpieces.  I later added their names so they could get some "kudos" from our birthday party guests. 

Birthday Party Snowmen by Asher-dasher

A Snowman than snuck into art class by Anika

Pick a Book

Take a trip to the library or look through your own collection as a family and find a book that fits your birthday theme.  Reading a book gives a nice quiet activity for your littlest party guests and your kids will love picking out a book for the party.

Accept Help from Talented Family Members!!!

I am so blessed to have a mother that can make the most amazing birthday cakes and treats.  Consider your family and friends and the talents they were given by God.  Don't hesitate to make a call and ask for their assistance, they will be flattered!  This helps lessen what you need to accomplish and is also a great opportunity to speak with your kids about how someone else is using their Talents to help your family.


Abram with his special Penguin cake
Nana is a talent Cake Maker!  Look at that happy little birthday boy!

______________
 So the next time you see a Birthday a few weeks out on your calendar, consider adding some laughter and a few messes to your "To-Do" list by including your family in the preparations.


Sunday, January 6, 2013

We Three Kings- An Epiphany Celebration for Kids!


About three years ago my mother, aunts and Grandmother started to host an Epiphany party for our children, a new tradition we absolutely love!

Epiphany is celebrated on January 6th to celebrate the Three King's visit to the Infant King Jesus.  There are many traditions throughout the world that are connected to Epiphany, so my family selected a few and created our own celebrational mix of fun.   What I love about this celebration is that it helps our family continue to celebrate Christmas as a season not just one day. So as our Three Kings finally arrive at the nativity scene, we have one more excuse to celebrate.

So in hopes that others can enjoy this same Epiphany tradition, here are a few ideas:


Becoming a King

The highlight of our celebration may be the transformation of ordinary kids into Wise Kings.  Now this is not an easy feat, but with a few supplies and patience it can be done!

Wear a Crown


Crown Supplies:

Poster Board cut into crowns
Self Stick Gems
Tape

Precut the crowns and allow the kids to apply their own gems.  Simply size to their heads and they are ready to go.

Wear a King Cape


Cape Supplies:

Gold Fabric
Ribbon
Iron-On Hem Tape

Cut the Gold Fabric into Rectangles large enough to be a cape.  Use the Iron-On Hem Tape to attach the Ribbon to the top of the Cape for tying.

Carry a Star


Star Supplies

Dowel
Hot Glue
Star Ornament

Attach the Star to the end of the Dowel with Hot Glue.  This Star can lead your Little Kings to the Baby Jesus.

Bring a Gift


Gift Supplies

Any reclosable pretty package
Piece of Fancy Paper

Help each child choose their "Gift" for Baby Jesus and write in on their piece of paper.  The adults usually join in by writing their "Gift".  The papers go into the reclosable package which will be taken to Baby Jesus

__________________________________

A Procession to the Baby Jesus


Once our Little Kings have a crown, cape, star and gift in hand they can march around the house singing "We Three Kings" or whatever other song would please the Baby King Jesus.  Once they arrive at the Nativity Scene we do a reading of the Bible Passage (Matthew 2: 1-12) and talk about what precious gifts we can give to the Baby King.  My children are currently intrigued by the King Herod the "Bad Guy" and those smart Kings that ran away from him, so the conversation was quite interesting.  After the Bible reading and discussion each child presents their Gift to the Baby Jesus.


The King Cake

After the gifts have been given, the child rush to the cake.  It couldn't be a true Epiphany Party without a cake! This isn't an ordinary cake, it is a King Cake, so tucked inside this cake are many plastic Baby Jesus figurines (carefully wrapped in wax paper before baking) which each child can discover.  After lighting our candles and singing "Happy Birthday Baby Jesus" (which they are certain the King's would have done upon arriving to find the Infant King ) each child get to enjoy their piece of cake.


The Sweetest Discovery of all...Baby Jesus!

The cake is a delightful ending to a celebration of Kings and Gifts for our Jesus.


The House Blessing

Another nice addition to the Epiphany celebration occurs when we head home, which is the Epiphany House Blessing.  I would recommend doing some research to find a blessing for your home, but this is another beautiful  tradition.  Our church provides chalk and a blessing which we then use each year to bless our home and the top of each room.  The marking made in chalk is a reminder all year of Christ blessing our home.  It is a great way to make your Epiphany celebration last the whole year long!

I hope you find one of these ideas helpful in making Epiphany another special part of your Christmas celebration !